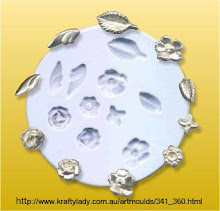
 Quilling with Silver Paper is another way to add embellishments to any piece. To make leaves cut strips 1/16” wide the length of the silver paper. Place the tip of a round toothpick on one end of the paper. Roll the paper around the toothpick. Gently slide the toothpick out of the rolled paper. If you want a looser effect or larger look loosen your grip on the roll and let it spring outward a little. With the toothpick, add a drop of silver paste to the open end and press it closed. To get a teardrop shape, press the rolled paper more on one side. Put the quilled piece on a firebrick and do not touch again. Remember: Too much moisture will cause the paper to disintegrate and moving the pieces once you have added the paste will cause minute fractures in the paste breaking the bond
 To make roses, cut a ½” square and round the corners. Cut a spiral into the center of the square as shown. Then, using the toothpick, begin at the center and roll toward the outside edge. Once again, pull the toothpick out and apply a drop of paste to glue the open end shut. Set this on the fire brick to dry.
I have found that if I let this dry 30 minutes and then torch fire my pieces for 1 minute, I can then attach these pieces with oil paste to a fired product.
When torch firing the quilled pieces, hold the torch back from the pieces lowering it as it heats. Heating the pieces too fast cause them to spring open.
Quilled roses have a cone shaped base so I set the leaves first leaving a small area to set the cone of the rose. This gives support to the roses and will also hide any imperfections or additional paste if it is needed to attach the rose.


No comments:
Post a Comment