Tuesday, December 24, 2013

Making Glass Totems


Do you ever wonder what to do with the crystal bowl your grandmother gave you or the vase from the last bouquet of flowers you received?  Let's get creative with them!   The next time you are hosting a bridal shower, a baby shower, birthday party or are just having a few guest over for wine and cheese, what better way to use up discarded glassware than to make serving totems.  Mix and match glass, colors and patterns to create beautiful setting for any occasion. 
 
 
You can add miniature LED lights, flowers, and greenery to create any setting. 
I will be selling totems so if you see something you like, email me for the cost.  My goal is to have something online before too long with pictures and prices. 
 
Cake Toppers
 
Shower Cake Toppers or Serving Totems
 
For girls


Try using glass totems at your next party as the focal point of your table.  You'll be amazed at the response you'll get from your guest while feeling good that you took those discarded dishes and have put them to good use. 

Sunday, May 12, 2013

Metal Clay World Conference 2009

The 2009 Metal Clay World Conference is next week! I will not be able to attend but my sister, Jen Lowe, will be teaching classes and is taking some of the pieces I've done to display. There will also be lots of diachroic "teardrops" for sale but there are only 2 diachroic hearts, as seen on this blog in the piece "Bleeding-Hearts". Jen can take orders for more but there is no guarantee of the size or color. I will try to keep them similar in size and shape as the one you see at the convention and on this site. For those of you going to the conference, have a great time and maybe I'll see you next time.

Tuesday, April 23, 2013

Clinics:   I have started giving clinics at the  Home Depot that I work for in Canon City, CO.  If you are in our area and want to attend one of our clinics, look us up online and give us a call or just stop in and ask when our next clinic will be on and what it will be about that week.  If I'm not busy, I'll be happy to talk to you on how to faux paint or do stencil plastering or one of our other DIY clinics.  
 
 
Faux Finish Walls
 
I painted this picture years ago and never liked it but recently my husband decided he wanted to hang it on his office wall.  It looked terrible on the white walls so I decided to paint the wall it was on a dark green as an accent color.  After rehanging the painting I still wasn't happy.  Since I like the glow I had gotten on the stencil plaster background, I decided to use different shades of Modern Master's Metallic Paints.
Using various large soft bristle brushes I added several colors and blended them to create a soft, almost Venetian plaster look.  I applied a matt finish on the finished wall and rehung the painting.  What a huge difference it made.  The once unwanted painting became a huge success.  Sometimes your artwork just needs a "WOW" background to bring out the colors.


Monday, April 2, 2012

stencil painting

This wall was painted with metallic paints. I used both Modern Master Metallics and Martha Steward metallic paints to create glowing shades of brown. I used 4 mil mylar to create aspen tree stencils. (If you don't want to make your own you can order very nice stencils from http://www.victorialarsen.com/default.htm
She also carries the blank mylar if you want to make your own. I found that using a wood burning knife worked much better than a stencil burner.
I mixed 20 minute drywall mud and a 4" drywall knife to apply the drywall mixture over the stencils. Once the drywall mix dried I painted about half of the leaves with Modern Masters "Flash Gold" paint to add more shimmer and light for more realistic aspen leaves. The 2 aspen trees form a framed setting and would look great with a white wicker bench and potted plants sitting around it. Just another fun wall to bring walls to life in your home.

Monday, February 20, 2012

Another Tree


I'm having so much fun leaning about painting on walls. This is a simple tree that I painted freehand on the wall. I wanted it to look like there is a gentle breeze and some of the leave are falling off and drifting around. Since my bedspread is white right now and it is winter I liked the idea of bears dressed for an winter outing sitting under the tree. What little girl wouldn't love to play and snuggle under her covers at night in this room?


You can't see the color on the leaves very well but I painted a metallic "Flash Blue" over the black leaves. When the light shines on them they become a brilliant peacock blue.


With a simple tree like this in a child's room it would be so easy to change the decor with each season. I can visualize tall dolls sitting and standing around a small child's table having a tea party for the a summer look. Add a lace table cloth and baskets of flowers to brighten the setting. Hang a noose from the ceiling and sit scarecrows under the tree for fall with fake spinderwebs criss crossing from the walls in the room. If you chose to have a winter setting all year, try painting snowflakes with Moder Masters "Flash Blue". It will hardly be noticeable on light walls but you will catch a glimpse of color for the impression of falling snow. How about stuffed bunnies, chicks and little fluffy lambs under the tree for spring. So many fun things to do with a simple design.


Oh, all the bears were found at various thrift stores on Seniors half price sells. Another fun project for the budget minded!

Friday, January 27, 2012

Funky tree painting


I've been in Denver the past 10 days having fun with my sister. We decided to paint a funky tree on the bedroom wall. We painted the wall black and the tree white with black vines. The leaves are a metallic paint called "Flash Copper". A plain beige wall became a fun place to retreat at night and it only took one day.

Sunday, January 8, 2012

Bunkroom Mural

I just finished my first mural for the bunkroom in our house. The paints don't show well but are metallic paints. They glow and change as the light changes or as you walk by. You can see it glow a little at the top by the window. These paints can be purchased at a lot of paint stores. I used a combination of Martha Steward metallic paints and Modern Master Metallic Paints. The colors are copper flash, gold, medallion, flash blue, antique bronze and antique copper. I highlighted the background with gold flash and blue flash. It is amazing what these colors do. After painting the horse I used a swiriling motion to use the same colors to creat the look of dust.
The bunkbeds in the room have throw pillows with horses in similar colors. I added a couple stuffed horses for kids who come to visit. A great way to add color and life to a dull room.

Monday, December 13, 2010

Watercolor cards

It is snowing in Colorado and I'm at my sisters having a great time doing simple watercolors that I will use as cards. I've stacked the cards one behind the other to dry and set one of Linda Petersons polymer clay characters in front to hold them up. I thought it was too cute and had to share it with you. Visit her blog and see what wonderful work she does.
http://www.lindapetersondesigns.blogspot.com

Friday, December 10, 2010

Another "Teardrop for Anna"


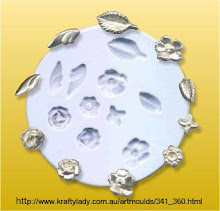
As another year draws to a close I am trying to get back into my studio. Another" Teardrop for Anna" is part of my collection for children born with heart defects. This piece was made by rolling a coil of clay and draping it around a piece of diachroic glass and looped from front to back to form the bail. The leaves were made from leftover clay in one of "Krafty Lady's" molds and attached with silver paste. The design idea was my sister-in-laws. Thank you Mary.
If any of you would like to make a piece like this I do have diachroic teardrops in various colors and sizes. Email me for more information.

Monday, November 29, 2010

Simple and Elegant "Class" project


How easy it is to make beautiful bracelets using metal clay. For this piece I used 35 grams of low fire/slow dry Art Clay and rolled it out 2 mm thick. I added the extra thickness for strength. Then I used one of Stamp of Excellence's stamps and pressed it into the clay for this design. I free formed this piece and let it dry then sanded and finished the piece as usual using Rio Grande's Black Max to patina. Now I have this simple yet elegant bracelet that I can wear to any outing, causal or formal. Judy, at Stamp of Excellance, has several great stamps that can be used for bracelets such as this. http://stampofexcellence.com/

Friday, April 3, 2009

Polymer Clay Turqoise Stone

For those of you that don't want to spend the extra money to purchase turquoise stones, you can always make them from polymer clay. This look alike stone was easy and fun to make with 2 colors of polymer clay and black acrylic paint.

To make this piece roll out your clay and cut it into a square. Roll out a strip for the bail and stamp it with a design. The stamp I used here was from "Stamp of Excellence". Cut around the shape. Fold the bail over a small straw and attach it to the square with silver paste. Fit a silver bezel around the polymer clay shape and press the bezel gently into the piece. Around the bezel I applied drops of silver with a syring. Fire the piece. When cool sand and finish it. Place the polymer clay stone into the piece and press the bezel edges to it. Great for beginner classes. By showing someone how to make a polymer clay look alike along with a metal clay piece you are promoting 2 products with a low cost.

Tuesday, March 31, 2009

Mask of Leaves

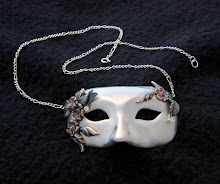
This is another sample of what you can do with the mask mold. I found some leaves on a bush and applied silver paste to them. After firing the leaves and polishing them I attached them together with oil paste and fired them in a kiln.
To make the mask I rolled out the clay and pressed it into the mold, cut around the edges and cut out the eyes then removed the piece from the mold. I attached bail backs with silver paste on the outside edges on the back. After sanding the mask and firing it I attached the leaves with oil paste. When the piece was cool I sanded and polished the piece. To achieve colored leave use Mr. Clean yellow, blue or both with liver of sulfur. I apply it with a small paint brush to avoid as much repolishing as possible. The first photo is before applying liver of sulfur and the second after. You choose which method you like the most. Remember you can always sand the color off the leaves or refire it to remove the color.

Sunday, March 29, 2009

"Happy" the dog, eyeglass pin


I love what you can do with Stamp of Excellence Stamps . To make this eyeglass pin, I rolled out 2 ovals shapes. On one use any stamp you think would be appropriate, stamp into the clay and cut the shape out. Roll out the second oval shape and lay your shape onto it. Attach it with silver paste. Then cut out an area to slip your glass frames through. Attach a brooch finding on the back, sand and fire. I used Max Black to outline the shape with a fine tip brush for more control instead of liver of sulfur. There are so many fun and quick pieces you can use to make intro and beginning classes fun.

Tuesday, February 17, 2009

Home for sale in Eagle CO

Time has flown by with very little time to be creative, something I really miss. We have taken this past year to start a business and remodel our house so that we could put it on the market. Since my husband is a custom builder we decided to make all the trim for our home. Every board is cut to length and width, planed, and sanded. Then filled and painted after installation. We put in new floors, granite counter tops and added a plate rack in the kitchen, which doesn't show on the video. The master bath was totally remodeled with new floors, tub and countertop as well as the utility, powder room and foyer. There are all new doors downstairs with refinished doors upstairs.
We spent last summer painting the outside of the house adding boulders throughout the yard.We put in a flagstone walk while terracing the back yard with rock walls creating multiple flower gardens. It has been a huge project but we love the results. We are completing the wood trim throughout the upstairs and are hoping to have the final touches within a couple weeks. After that............ I will be able to start creating and playing again! I've several new pieces that I made on a 3 week summer trip to San Diego while my sister, Jen Lowe, taught classes. As soon as we have the last of the remodeling done I will give these pieces their last touches and have them on my blog, unless of course the house sells. Our realtor had a video of our home made to use on his website and MLS listings. I have it here on my website. Please feel free to send the video to any friends that might have any interest in moving to the mountains. I have the best neighbors possible and views of the mountains have really been an inspiration while working in my studio.

Tuesday, August 5, 2008

Death of a Jester

Death of a Jester was made using 30 grams of 650 lowfire/slowdry metal clay. I pressed it into a matrix board that was used to create rubber stamps by "Stamp Of Excellence" Purple and White cz's were set into the clay for embellishments. After obtaining a mirror finish I dipped the piece into liver of sulfur and Mr. Clean Blue.
Judi, from "Stamp Of Excellence" is working with me as I design rubber stamps that can be used in scrapbooking and metal clay. I find by using her moulds that she makes for the stamps it is easier to cut around the shapes without distorting the edges. This particular design is one that Judi designed for me to try.

Monday, June 30, 2008

New Leaves

Today is a beautiful day in the mountains so while I've been working in the yard I've been picking small leaves. I waited through the long winter with so many ideas but no leaves so this year I've decided to pick leaves as I find them and give them 2-3 coats of silver paste. I can set them aside in a safe place to finish this winter as I work on new designs. I am also experimenting draping the leaves as they dry with various size objects. When I fire them I will support the areas as needed with bits of fiber blanket. Another reason to expand my flower beds.

Sunday, June 29, 2008

Colorado Chapter of Art Clay World Society

What a great day I had yesterday with everyone here from the Colorado Chapter of Art Clay Society. I met such great new people and visited with old friends. Thank you each for coming and sharing your artwork with us.
Jen Lowe gave a great presentation on blogging and a short demonstration on quilling with silver paper.
Congradulations Sherry on completing your senior certification. Your class pieces are awesome. I am so happy for you and the opening of your new studio and classroom, "PaperSilverStone" and "Peacock Gallery" in Canon City, CO. I will be there as often as I can.
What a inspiration each of you are, and now, I really don't have anymore excuses to put off starting new designs.
To all my new friends from Grand Junction, CO. I am all for starting a day we can all get together once a month or as often as possible. Email or call anytime.

Sunday, June 15, 2008

Spring

Just to touch base. I wanted to thank Feedjit for adding Israel's flag to their world map. It is great to see it included with all the other national flags. It is spring and yardwork has taken over my life for the moment. I have planted lots of flowers and a few vegetables. It has been right at freezing everynight so I have been covering the plants trying to keep them alive. We are also in the process of painting the exterior of the house as well as rockwork and finishing the deck we started last year.
I am working "slowly" on a new necklace and have several new sketches for designs. Some of these designs will be shown as patterns later.
The 28th of June we are having the Colorado Chapter meeting for Art Clay World at my home and I'm looking forward to meeting new members and visting with everyone.

Thursday, May 8, 2008

Star of David eyeglass pen


This star of David eyeglass pen was made by rolling out 20 grams of clay and cutting it into a rectangle shape. Next I rolled out an additional 5 grams of clay and cut a second piece to lay over the top Attach it by brushing on a layer of silver paste. Fill the edges with paste or by using the syringe. Cut out a small opening for the glass frame to slide through. Attach a brooch finding to the back.
I sand my pieces in the greenware stage using all grits of sandpaper before attaching any embellishments. Embellishments can be made at any time with left over clay and stored for later use. I've been saving the clay star for some time and when I was invited to a Brit Milah cermoney, it was fast and easy to make something special.